Saturday Night Dreams. Building a hyper-simple httpd Docker Server in Pycharm Professional
In this hyper-quick guide we go over building an entire Python Server / html page inside a docker standalone in 3 short files!


Pycharm Professional is crazy powerful. You can get it for free if you are a student, and it has full Docker support. Our pieces of this are pretty straight forward.
- We will have a standard .html file
- It will be served with a simple app.py python httpd server
- That will be wrapped into a docker which will make it portably deployable.
- We are building an entire server / ecosystem / file content in a super-simple setup.
Start a new docker file:
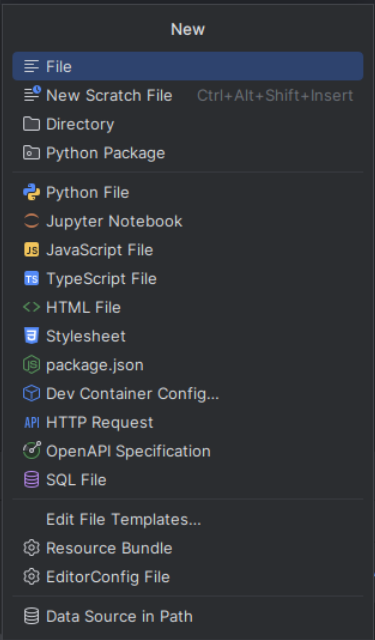
Screenshot at 2024-12-07 19-22-25
Inside of it put:
FROM python:3.9-slim
WORKDIR /app
COPY app.py .
COPY page.html .
EXPOSE 9055
CMD ["python", "app.py"]
Now we will make the python server block (app.py)
from http.server import HTTPServer, BaseHTTPRequestHandler
class SimpleHTTPRequestHandler(BaseHTTPRequestHandler):
def load_file(self, tfile):
with open(tfile, "rb") as f:
self.data = f.read()
return self.data
def do_GET(self):
mdata = self.load_file('page.html')
self.send_response(200)
self.send_header("Content-type", "text/html")
self.end_headers()
self.wfile.write(mdata)
saddress = 9055
if __name__ == "__main__":
server_address = ('', saddress)
httpd = HTTPServer(server_address, SimpleHTTPRequestHandler)
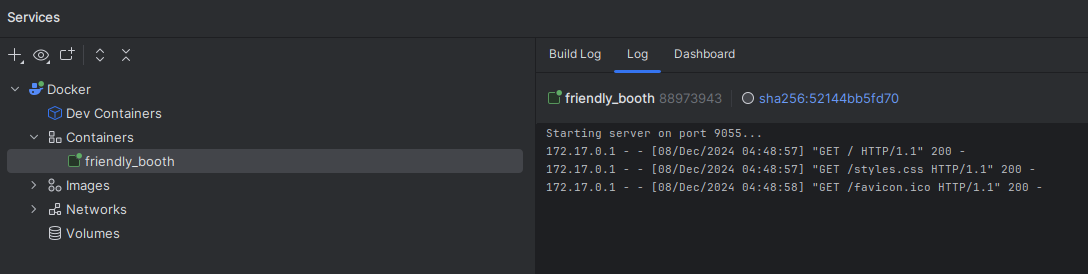
print(f"Starting server on port {saddress}...")
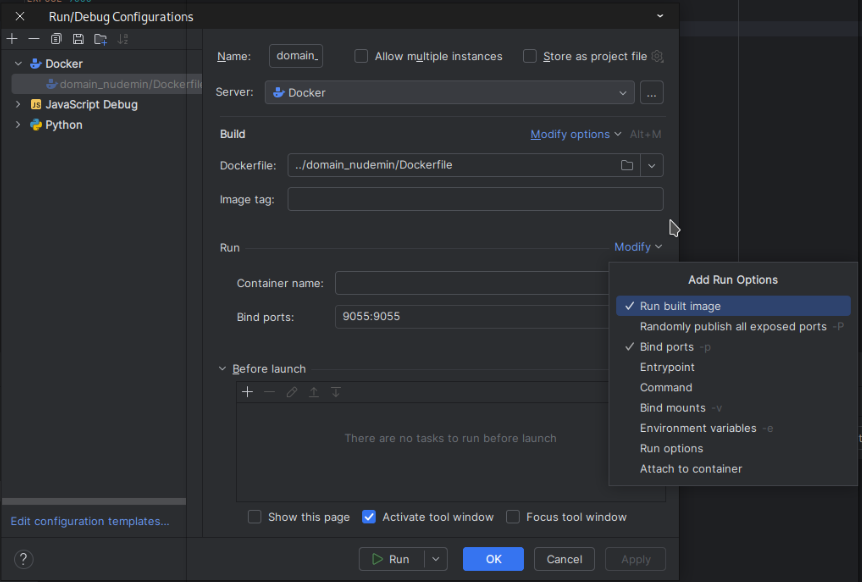
httpd.serve_forever()- We can see the sync from port 9055 to port 9055 in the docker
- Please note - this will NOT automatically map to the system 9055. To enable this you need to modify your bind ports for the Docker run configuration.
- Finally inside your page.html you put a standalone block of html that will be served as in:
<!DOCTYPE html>
<html lang="en">
<head>
    <meta charset="UTF-8">
    <title>Web Page Title</title>
   <link rel="stylesheet" href="styles.css">
</head>
<style>
     body {background-color: #dceded;}

 h1 {
     text-align: center;
     text-shadow: 2px 2px 4px #555;
 }

 .first-para {
     text-align: center;
     font-size: 20px;
 }

 .second-para {
     text-align: center;
     font-size: 20px;
 }

 .third-para {
     text-align: center;
     font-size: 20px;
 }
</style>
<body>
<div>
  <h1 class="main-title">My WebPage Title</h1>
  <div class="first-para">This page is up!</div>
  <div class="second-para">Second line </div>
  <div class="third-para">Third Para</div>
</div>
</body>

</html>
And that's it. Pycharm has full support simply click the run button and Pycharm will stand up this container for you.
Deploying this could not be simpler. Simply copy the entire directory to your online VPS enter it and then manually build it.
docker build -t smallserver .And then run it.
docker run -it --restart unless-stopped -p9055:9055 --name container_name -d smallserver- The -p 9055:9055 is important as it will map the host port 9055 to the internal container port 9055 which is bound to the listening app.py 9055.